
Getting your chimney inspected might seem like just another box to check off your home maintenance list. But did you know that removing all objects within a 3-foot radius of the fireplace is one of the most overlooked steps and can make or break a successful inspection? Most homeowners miss this simple task and end up complicating the whole process, so clearing the area could actually save both your belongings and your wallet in the long run.
Table of Contents
- Step 1: Clear The Area Around The Chimney
- Step 2: Check For Accessibility And Safety
- Step 3: Remove Obstructions Inside The Fireplace
- Step 4: Inspect For Signs Of Damage Or Wear
- Step 5: Document Your Findings And Prepare Questions
Quick Summary
| Key Point | Explanation |
|---|---|
| 1. Clear 3-Foot Radius | Remove all items within a 3-foot radius around the chimney to ensure safe access for technicians during the inspection. |
| 2. Establish Safe Pathways | Check that pathways to the chimney are at least 3 feet wide and free of obstacles like furniture or debris, enabling technicians to work safely. |
| 3. Remove Fireplace Obstructions | Clear debris and ash from inside the fireplace to facilitate a thorough inspection and allow technicians to assess the chimney’s condition. |
| 4. Document Observations | Keep detailed notes and photographs of any visible damage or concerns to aid the technician during the inspection and highlight maintenance needs. |
| 5. Prepare Relevant Questions | Formulate questions regarding your chimney’s condition based on your observations to engage effectively with the inspector and understand necessary maintenance. |
Step 1: Clear the Area Around the Chimney
Preparing your home for a chimney inspection starts with creating clear access and a safe working environment around your fireplace and chimney area. This crucial first step ensures that technicians can perform a thorough and efficient inspection while preventing potential damage to your belongings.
Begin by removing all decorative items, furniture, and loose objects within a minimum 3-foot radius around the fireplace and hearth. This includes holiday decorations, picture frames, area rugs, potted plants, and any fragile items that could be accidentally knocked over during the inspection process. Carefully relocate these items to another room or secure area to prevent accidental breakage or interference with the chimney professional’s work.
Next, focus on protecting your flooring and surrounding surfaces. Lay down a large drop cloth or plastic sheeting to catch any potential debris or dust that might fall during the inspection. This protective measure will help maintain the cleanliness of your living space and make post-inspection cleanup much easier. If you have hardwood floors or delicate surfaces near the chimney, consider using additional protective coverings to prevent scratches or dust accumulation.
Learn more about chimney inspection preparation for comprehensive guidance on creating an optimal inspection environment.
As you clear the area, also take a moment to inspect the immediate surroundings for any potential hazards. Look for loose tiles, damaged flooring, or any structural issues near the chimney that might be worth mentioning to the technician. Removing clutter not only facilitates a smoother inspection but also allows professionals to identify any underlying issues more effectively.
Key items to remove before the inspection include:
- Decorative candles and holders
- Small electronic devices
- Artwork or wall hangings near the fireplace
- Seasonal decorations
- Movable furniture pieces
By meticulously preparing the area around your chimney, you demonstrate proactive home maintenance and help ensure a comprehensive and efficient inspection process. Your careful preparation allows technicians to focus entirely on assessing your chimney’s condition without navigating around obstacles or worrying about potential damage to your belongings.

Step 2: Check for Accessibility and Safety
After clearing the area around your chimney, the next critical step in preparing for a chimney inspection involves ensuring complete accessibility and establishing a safe environment for the technicians. This step goes beyond simple space clearing and focuses on creating an optimal pathway and removing potential obstacles that could compromise the inspection process.
Begin by carefully examining the route from your home’s exterior entrance to the chimney location. Measure and verify that there is a clear pathway at least 3 feet wide, which allows technicians to move equipment and themselves comfortably. Remove any seasonal items like outdoor furniture, potted plants, or decorative elements that might block access. If you have outdoor stairs or walkways leading to the chimney, ensure they are free of debris, ice, or potential tripping hazards. Pay special attention to uneven surfaces or loose stones that could create safety risks during the technician’s approach.
Explore comprehensive chimney inspection safety protocols for additional guidance on preparing your home environment. Technicians will need unobstructed access not just inside your home, but also around the exterior chimney structure. Walk the entire path and look for potential impediments from multiple angles.
Inside your home, verify that all access points near the chimney are functional and safe. This includes checking that doors and gates open fully without resistance, ensuring electrical outlets near the inspection area are in good condition, and confirming that any protective coverings or mats are securely placed. Remove any electrical cords, children’s toys, or pet accessories that might create tripping hazards or interfere with the technician’s movement.
Critical safety checks before the inspection include:
- Verifying smoke and carbon monoxide detectors are operational
- Checking that fire extinguishers are easily accessible
- Ensuring proper lighting in and around the chimney area
- Confirming no loose electrical connections near the inspection zone
If you have pets, make arrangements to keep them in a separate area during the inspection to prevent potential accidents or interference. Consider creating a designated safe space for animals that is distant from the work area but still comfortable and familiar.
A thorough accessibility and safety check demonstrates your commitment to a smooth, professional chimney inspection. By anticipating potential challenges and proactively addressing them, you help ensure the technicians can perform their job efficiently and safely.
Here is a checklist table to help ensure all key accessibility and safety measures are completed before your chimney inspection.
| Accessibility & Safety Checklist | Status | Notes |
|---|---|---|
| Pathway to chimney at least 3 feet wide | ||
| Pathway free of obstacles/debris | ||
| Outdoor stairs/walkways clear and safe | ||
| Access points like doors/gates fully functional | ||
| Electrical cords/toys/pet items removed | ||
| Smoke and carbon monoxide detectors operational | ||
| Fire extinguishers easily accessible | ||
| Adequate lighting in and around chimney area | ||
| Pets secured away from inspection area |
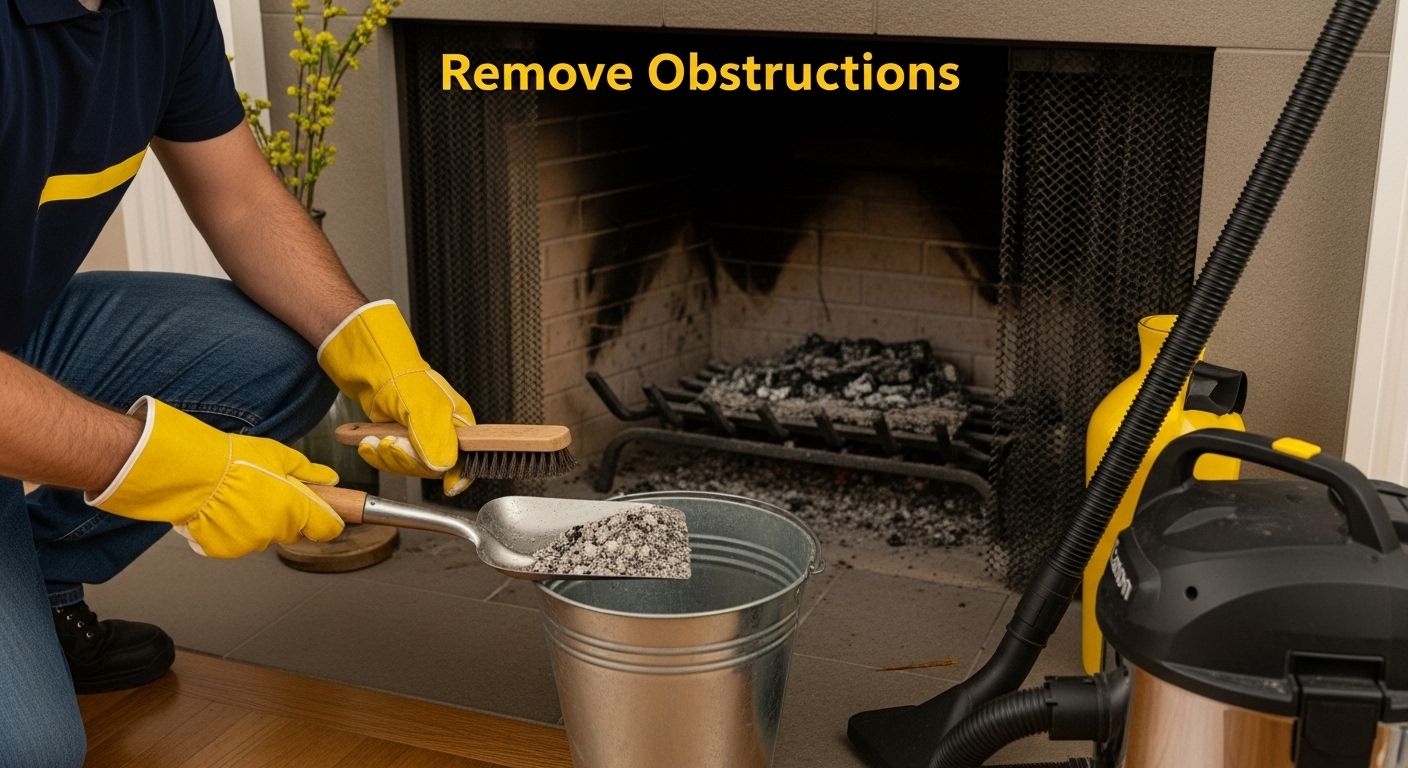
Step 3: Remove Obstructions Inside the Fireplace
Removing obstructions inside the fireplace is a critical step in preparing for a comprehensive chimney inspection. This process involves carefully clearing out accumulated debris, ash, and potential blockages that could impede the technician’s assessment and compromise your chimney’s overall functionality.
Start by gathering essential protective gear before beginning the cleanup. Wear sturdy work gloves, safety glasses, and a dust mask to protect yourself from potential respiratory irritants and sharp debris. Use a metal ash bucket with a tight-fitting lid to safely collect and dispose of ash and smaller debris. Avoid using plastic containers, as hot embers can potentially melt or ignite them, creating an unexpected fire hazard.
Discover comprehensive chimney maintenance strategies to enhance your home’s safety and efficiency. Carefully remove loose ash and debris using a specialized ash shovel, working methodically from the front of the fireplace toward the back. Gently sweep accumulated materials into the metal bucket, taking care not to create dust clouds that could scatter particles throughout your living space.
Pay close attention to potential obstructions that might not be immediately visible. Look for accumulated creosote, animal nests, fallen debris, or any unusual buildup that could indicate underlying issues. Creosote, a highly flammable substance created by burning wood, often appears as a dark, tar-like residue on fireplace walls and can pose significant fire risks if left unchecked. Use a sturdy wire brush to carefully scrape away loose creosote deposits, ensuring you do not damage the fireplace’s interior surface.
Critical items to remove before the inspection include:
- Old newspapers or combustible materials
- Accumulated wood chips or bark
- Cobwebs and dust buildup
- Small debris or foreign objects
- Loose bricks or damaged mortar pieces
Thoroughly inspect the fireplace floor and walls for any signs of structural damage, cracks, or unusual wear. Take photographs of any concerning areas to discuss with the chimney inspection technician. If you discover significant damage or are unsure about the condition of your fireplace, it is best to wait for professional guidance rather than attempting extensive repairs yourself.
Once you have completed the cleaning process, use a shop vacuum with a HEPA filter to remove any remaining fine dust and ensure a clean, clear workspace for the upcoming professional inspection. Your meticulous preparation demonstrates responsible homeownership and helps facilitate a more efficient and comprehensive chimney assessment.
This table outlines the recommended tools and materials for safely cleaning obstructions from inside your fireplace prior to a chimney inspection.
| Tool/Material | Purpose | Notes |
|---|---|---|
| Work gloves | Protect hands from debris and sharp objects | Sturdy, heat-resistant |
| Safety glasses | Shield eyes from dust and falling particles | Wraparound style recommended |
| Dust mask | Prevent inhalation of ash and fine debris | N95 or higher is best |
| Metal ash bucket (with lid) | Safe collection and disposal of ashes | Avoid using plastic |
| Ash shovel | Effectively scoop debris and ash | Metal preferred |
| Wire brush | Remove creosote and stubborn residue | For fireplace walls only |
| Shop vacuum (HEPA filter) | Remove remaining fine dust | Use after dry sweeping |
Step 4: Inspect for Signs of Damage or Wear
Inspecting your chimney and fireplace for signs of damage or wear is a crucial step in preparing for a professional chimney inspection. This proactive approach allows you to identify potential issues early and provide valuable information to the technician, potentially preventing more extensive and costly repairs down the line.
Begin with a visual examination of the fireplace interior, using a powerful flashlight to illuminate every corner and surface. Look carefully for visible cracks, missing mortar, discoloration, or structural irregularities that might indicate underlying problems. Pay special attention to the firebox, where signs of wear are most likely to appear. Hairline cracks, crumbling mortar, or areas with unusual staining can signal potential moisture intrusion or structural stress that requires professional evaluation.
Learn more about identifying chimney maintenance warning signs to enhance your understanding of potential repair needs. Extend your inspection to the exterior chimney structure if safely accessible. From ground level, use binoculars to examine the chimney crown, brick or stone surfaces, and flashing. Look for signs of deterioration such as missing mortar, loose bricks, or visible gaps that could compromise the chimney’s integrity.
Inside your home, check the walls and ceiling surrounding the fireplace for any subtle indicators of potential chimney issues. Water stains, peeling paint, or unusual odors can suggest hidden moisture problems or ventilation challenges. These seemingly minor signs often indicate more significant underlying issues that may require immediate professional attention.
Critical areas to thoroughly inspect include:
- Firebox interior and walls
- Chimney flue lining
- Mortar joints and brick condition
- Damper mechanism functionality
- Chimney crown and exterior surfaces
Document your findings by taking clear, well-lit photographs of any areas of concern.
These images can provide valuable context for the professional inspector and help track changes over time. Use a smartphone with good camera resolution to capture detailed shots, ensuring proper lighting and focus. If possible, include a reference object in the image to provide scale and context for any observed damage.
Remember that while a thorough homeowner inspection is helpful, it cannot replace the expertise of a professional chimney technician. Your observations serve as a preliminary assessment, helping to guide the professional inspection and potentially identifying areas requiring closer examination. By taking the time to carefully inspect your chimney and fireplace, you demonstrate responsible home maintenance and commitment to preserving your property’s safety and functionality.
Step 5: Document Your Findings and Prepare Questions
Documenting your findings and preparing thoughtful questions is the critical final step in preparing your home for a comprehensive chimney inspection. This proactive approach transforms your preliminary assessment into a valuable resource for the professional technician, ensuring a more thorough and efficient inspection process.
Create a detailed written record of everything you observed during your previous inspection steps. Use a dedicated notebook or digital document to compile your findings, organizing information systematically. Include precise descriptions of any cracks, discoloration, moisture spots, or structural irregularities you discovered. Accompany your written notes with the photographs you captured earlier, creating a comprehensive visual and written record that provides context for the upcoming professional inspection.
Explore comprehensive chimney maintenance documentation strategies to enhance your home maintenance approach. When preparing your questions, focus on specific observations and concerns that require professional expertise. Approach your documentation with a methodical and objective mindset, separating definitive issues from potential speculative concerns.
Consider the timeline of your chimney’s history and usage when formulating questions. Note the last professional inspection date, frequency of fireplace use, and any previous repairs or maintenance work. This contextual information helps technicians understand your chimney’s specific history and potential vulnerability points. If you have noticed any unusual performance characteristics like smoke backup, strange odors, or inconsistent draft, document these details precisely.
Critical questions to prepare for the chimney inspector include:
- What is the current condition of the chimney flue lining?
- Are there any structural concerns that require immediate attention?
- How does the current creosote buildup compare to acceptable levels?
- What maintenance recommendations do you suggest for my specific chimney?
- Are there any potential safety hazards I should be aware of?
Organize your documentation in a clear, easy-to-read format. Consider creating a digital folder that includes written notes, photographs, and any relevant maintenance records. This comprehensive approach demonstrates your commitment to home maintenance and provides the inspector with valuable preliminary information. By presenting a well-prepared documentation package, you facilitate a more targeted and efficient inspection, potentially saving time and identifying potential issues before they become significant problems.
Take the Next Step to a Cleaner and Safer Home Environment
You have just completed essential steps to prepare your home for a chimney inspection, removing clutter, checking for hazards, and documenting every concern. Yet many San Antonio and Austin homeowners still worry about hidden dust, debris, or allergens lurking in areas they cannot see, especially after years of fireplace use. If you want a truly comprehensive approach to home safety and clean air, addressing your ductwork is just as important as your chimney. Clearing chimney obstructions and inspecting for wear helps prevent fires, but neglected air ducts can quietly diminish your air quality and comfort.
Trust the professionals who understand what it means to protect your home and family. At Green Home Duct Cleaning, our team delivers eco-friendly solutions that complement your fire safety efforts with outstanding indoor air quality. Do not wait until health issues or extra cleaning costs arise. Visit Green Home Duct Cleaning today to book your professional duct cleaning and give your home the fresh start it deserves.
Frequently Asked Questions
How should I prepare my home for a chimney inspection?
To prepare your home for a chimney inspection, clear the area around the fireplace, check for accessibility and safety, remove obstructions inside the fireplace, inspect for signs of damage or wear, and document your findings with notes and questions for the technician.
What items should I remove from around the chimney before an inspection?
You should remove decorative items, furniture, and loose objects within at least a 3-foot radius around the fireplace, such as candles, electronic devices, and seasonal decorations to provide safe access for the technician.
What signs of damage should I look for before a chimney inspection?
Before a chimney inspection, look for visible cracks, discoloration, missing mortar, water stains, and structural irregularities in both the fireplace interior and the surrounding areas to identify potential issues and discuss them with the technician.
Why is it important to document findings before a chimney inspection?
Documenting findings helps you provide valuable context to the chimney technician, ensuring that they can address specific concerns efficiently. A detailed record of issues observed and any relevant history can facilitate a more thorough inspection.