
Home vents do a lot more than just circulate air. Cleaning vents can slash allergens and boost airflow, making a real difference to your air quality and comfort. Most folks think a quick dusting is all it takes. But skip a real inspection and you might miss big problems hiding out of sight.
Table of Contents
- Step 1: Inspect Your Vent Locations And Accessibility
- Step 2: Remove Vent Covers For Inspection
- Step 3: Check For Blockages And Obstructions
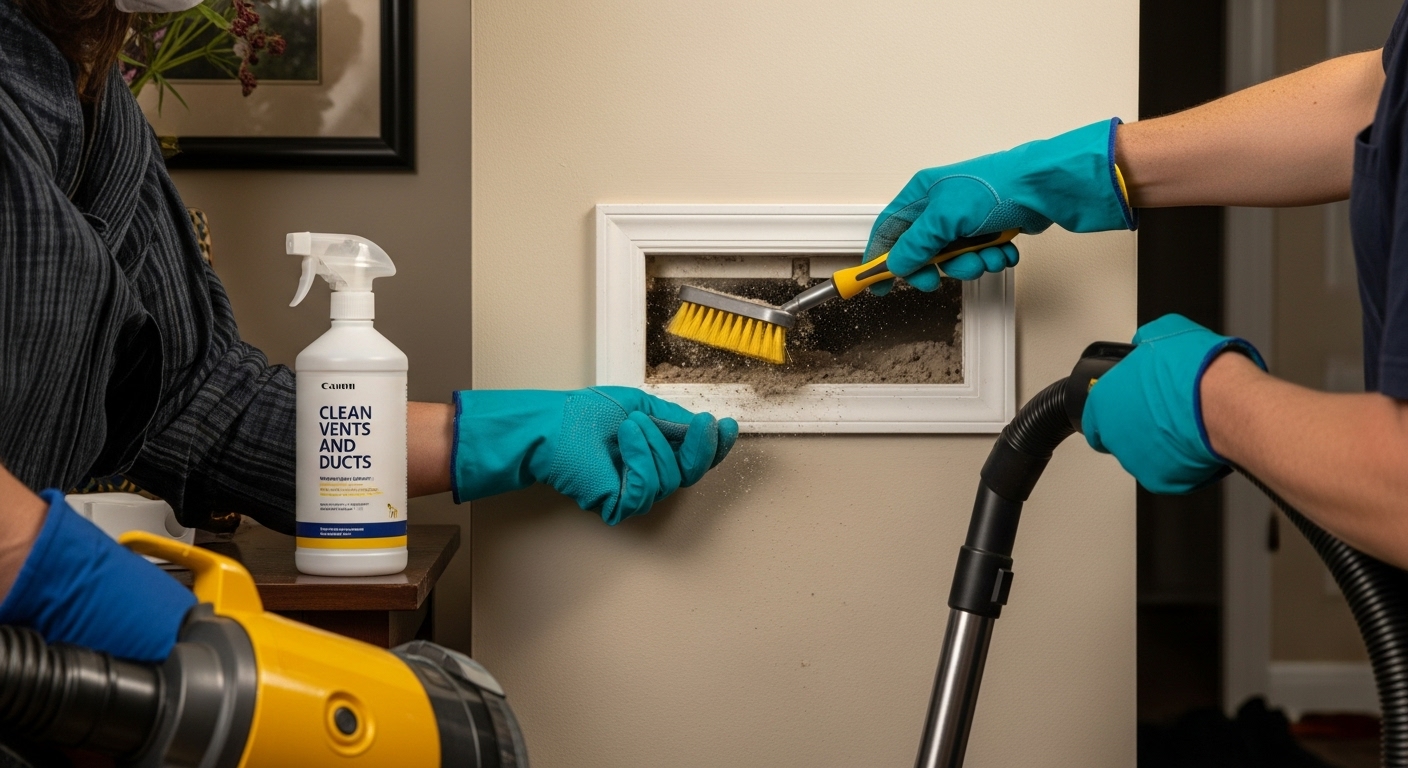
- Step 4: Clean Vents And Ducts As Necessary
- Step 5: Reattach Vent Covers And Conduct Final Checks
Quick Summary
| Key Point | Explanation |
|---|---|
| 1. Identify and map all vent locations | Create a detailed map of your home’s vents to understand ventilation and spot potential issues early on. |
| 2. Remove vent covers for deeper inspection | Use appropriate tools and safety gear to access and check hidden areas within vents, ensuring thorough examination. |
| 3. Systematically check for blockages | Inspect each vent for visible blockages and remove them cautiously to maintain optimal airflow and air quality. |
| 4. Clean vents and ducts thoroughly | Use proper cleaning tools to eliminate dust and debris, enhancing indoor air quality and system efficiency. |
| 5. Reattach covers and check system performance | Securely reinstall vent covers, assess airflow, and identify any issues to ensure the system is functioning correctly. |
Step 1: Inspect Your Vent Locations and Accessibility
Checking your home’s vents is a critical maintenance task that helps ensure optimal air quality, energy efficiency, and system performance. This initial inspection phase allows you to understand your home’s ventilation network and identify potential issues before they become costly problems.
Begin by creating a comprehensive map of your home’s ventilation system. Walk through each room systematically, noting the location of all visible vents including air conditioning registers, return air grilles, bathroom exhaust vents, dryer vents, and exterior wall or roof vents. Pay special attention to vents in less frequently accessed areas such as attics, crawl spaces, and utility rooms.
For each vent location, perform a careful visual examination. Look for obvious signs of blockage, dust accumulation, or damage. Check that vents are unobstructed by furniture, curtains, or stored items that might impede airflow. Use a flashlight to inspect deeper into vent openings, looking for debris, dust buildup, or signs of pest intrusion.
Accessibility is key during this inspection. Ensure you can easily reach each vent for future cleaning and maintenance. If vents are located in hard-to-reach areas, consider using a step ladder or extending tools to get a thorough view. Explore our comprehensive air duct inspection guide for Texas homeowners to gain more insights into navigating challenging vent locations.
Document your findings carefully. Create a simple sketch or digital map marking each vent’s location, noting any immediate concerns or areas requiring closer attention. This documentation will serve as a valuable reference for future maintenance and can help professional technicians understand your home’s specific ventilation layout.
The following table summarizes the essential tools and protective gear needed for inspecting and cleaning your home’s vent system, along with their primary purposes.
| Tool / Material | Purpose |
|---|---|
| Screwdriver set (flathead, Phillips) | Remove and reattach vent covers |
| Work gloves | Protect hands from dust and debris |
| Protective eyewear | Shield eyes during removal |
| Flashlight | Illuminate interior vent spaces |
| Vacuum with hose attachment | Remove dust and loose debris |
| Soft-bristled brush | Gently scrub vent surfaces |
| Microfiber cloths | Wipe surfaces and capture fine dust |
| Disposable dust mask | Prevent inhaling dust and allergens |
| Drop cloth | Catch debris and keep area clean |
Verification checklist for a successful vent location inspection:
- All vents are identified and mapped
- Vents are visually inspected for blockages
- Accessibility to each vent is confirmed
- Preliminary notes on condition are recorded
By completing this thorough initial inspection, you’re taking a critical first step in maintaining your home’s ventilation system and ensuring clean, efficient airflow throughout your living space.
Step 2: Remove Vent Covers for Inspection
Removing vent covers is a delicate but crucial step in thoroughly examining your home’s ventilation system. This process allows you to access hidden areas and identify potential issues that might be obscured during a surface-level inspection.
 Proper preparation and careful technique are essential to prevent damage and ensure a comprehensive examination.
Begin by gathering the necessary tools for safe vent cover removal. You will need a screwdriver set with multiple head types (flathead and Phillips head), work gloves to protect your hands, and a clean cloth or drop cloth to catch any debris. Wear protective eyewear to shield your eyes from potential dust or debris that might dislodge during the removal process.
Before removing any vent cover, turn off your HVAC system to prevent air circulation that could spread dust or potential contaminants. For ceiling and wall vents, carefully examine the cover’s attachment method. Most vent covers are secured with small screws located at each corner. Use the appropriate screwdriver to slowly and gently remove these screws, keeping them in a safe place for reassembly.
Check our detailed air duct inspection checklist for Texas homeowners to ensure you don’t miss any critical steps during your vent cover removal process. Some older or specialized vents might have spring clips or snap-in mechanisms, so approach each vent with patience and careful observation.
As you remove each cover, immediately inspect the surrounding area for signs of dust accumulation, mold, pest evidence, or structural damage. Use your flashlight to illuminate the interior of the vent opening, looking deep into the ductwork for any unusual conditions. Take clear, well-lit photographs of your findings to document the current state of your vents.
Verification checklist for successful vent cover removal:
- All vent covers are carefully removed
- HVAC system is turned off
- Screws are safely stored
- Initial interior vent inspection is completed
- Photographs of vent interiors are taken
By meticulously removing vent covers and conducting a thorough initial inspection, you’re setting the stage for a comprehensive evaluation of your home’s ventilation system and ensuring optimal air quality and system performance.
Step 3: Check for Blockages and Obstructions
Identifying and removing blockages in your home’s ventilation system is crucial for maintaining optimal air quality and ensuring efficient airflow. This step requires careful examination and systematic investigation of potential obstructions that can compromise your HVAC system’s performance and your indoor air quality.
Start with a methodical visual inspection using a powerful flashlight that can illuminate deep into the vent openings. Look for common types of blockages including accumulated dust, pet hair, construction debris, fallen insulation, and potential pest nests. Some obstructions might not be immediately visible, so use a small handheld mirror to angle light and inspect hard-to-see areas within the ductwork.
Pay special attention to the different types of potential blockages. Soft obstructions like dust and lint can often be gently removed with a long, flexible cleaning tool or vacuum attachment. More substantial blockages such as construction materials, fallen insulation, or accumulated debris might require more specialized removal techniques. Exercise caution to avoid pushing debris further into the ductwork, which could create more significant problems.
For harder-to-reach areas or complex blockage scenarios, consider using specialized tools like a flexible inspection camera or a duct cleaning snake. These tools can help you navigate and document obstructions in areas that are not directly accessible. When using such equipment, move slowly and carefully to prevent damaging the duct lining or internal components.
Remember that some blockages might indicate more significant issues within your ventilation system. Signs of persistent moisture, mold growth, or extensive debris accumulation could suggest underlying problems that might require professional intervention. Learn more about comprehensive air duct inspection techniques for Texas homes to understand when DIY methods might not be sufficient.
Verification checklist for identifying and addressing vent blockages:
- All visible blockages are documented
- Soft obstructions are carefully removed
- Hard-to-reach areas are inspected with specialized tools
- Potential signs of systemic issues are noted
- Areas requiring professional attention are identified
By thoroughly examining and addressing blockages, you’re taking a critical step in maintaining your home’s ventilation system, ensuring clean air circulation, and preventing potential long-term damage to your HVAC infrastructure.
Step 4: Clean Vents and Ducts as Necessary
Cleaning your home’s vents and ducts is a critical maintenance task that goes beyond simple dust removal. This step focuses on systematically eliminating accumulated debris, improving air quality, and ensuring your ventilation system operates at peak efficiency. Proper cleaning can significantly reduce allergens, improve airflow, and prevent potential health risks associated with dirty ventilation systems.
Begin the cleaning process by selecting appropriate tools. You will need a vacuum with a long hose attachment, soft-bristled brushes, microfiber cloths, compressed air, and protective gear including disposable gloves and a dust mask. For ceiling and wall vents, start by using the vacuum’s brush attachment to gently remove loose dust and debris from the vent cover and immediate surrounding area. Move slowly and carefully to prevent pushing dirt further into the ductwork.
For deeper cleaning, use a combination of techniques. Compressed air can help dislodge stubborn dust particles from hard-to-reach corners, while microfiber cloths can capture fine particles without scratching vent surfaces. Pay special attention to areas with visible buildup, using gentle circular motions to lift and remove accumulated dust. If you encounter significant grime or potential mold growth, consider using a mild, non-toxic cleaning solution specifically designed for HVAC systems.
Explore our comprehensive spring cleaning guide for Texas air ducts to gain deeper insights into advanced cleaning techniques and potential warning signs. While DIY cleaning is effective for routine maintenance, remember that some situations might require professional intervention, especially if you discover extensive mold, pest infestations, or significant structural issues within your ductwork.
When cleaning return air vents and registers, remove them completely if possible. Clean both the cover and the visible interior of the duct opening. Use a vacuum with a HEPA filter to ensure that captured dust and allergens are effectively trapped and not redistributed into your living space.
Verification checklist for thorough vent and duct cleaning:
- All vent covers are removed and cleaned
- Loose debris is vacuumed from vent openings
- Hard-to-reach areas are addressed with compressed air
- Microfiber cloths are used for detailed surface cleaning
- Potential problem areas are documented for further investigation
By meticulously cleaning your vents and ducts, you’re taking a proactive step in maintaining a healthy indoor environment and protecting your home’s ventilation infrastructure.
Step 5: Reattach Vent Covers and Conduct Final Checks
The final stage of your vent inspection process involves carefully reattaching vent covers and performing comprehensive system checks to ensure everything is functioning correctly. This critical step bridges your thorough cleaning and inspection with the ultimate goal of restoring your ventilation system to optimal performance.
Begin by meticulously reinstalling each vent cover, paying close attention to proper alignment and secure attachment. Use the original screws you carefully preserved during removal, ensuring they are tightened evenly but not over-tightened, which could potentially damage the vent cover or surrounding surface. Check that each cover sits flush against the wall or ceiling, with no gaps or misalignments that could compromise airflow or allow dust infiltration.
After reattaching all vent covers, turn on your HVAC system and conduct a comprehensive performance assessment. Listen carefully for any unusual sounds such as whistling, rattling, or excessive noise that might indicate improper installation or underlying issues discovered during your inspection. Observe the airflow from each vent, checking for consistent and strong air movement that suggests your cleaning efforts have successfully improved system efficiency.
Learn more about identifying potential mold issues during your home maintenance to understand the importance of maintaining clean, well-functioning vents. If you notice any persistent problems or suspect more complex issues beyond basic maintenance, consider scheduling a professional inspection to ensure your home’s ventilation system remains in top condition.
For a thorough final check, use a handheld infrared thermometer to measure the temperature of air emerging from different vents. Consistent temperatures across various registers can indicate balanced airflow and proper system functioning. Take notes on your observations, documenting any areas that might require future attention or professional assessment.
Verification checklist for successful vent cover reattachment and system check:
- All vent covers are correctly and securely reinstalled
- HVAC system operates without unusual sounds
- Airflow is consistent and strong from all vents
- Temperature readings are uniform across different registers
- No visible gaps or misalignments around vent covers
By meticulously completing these final checks, you’ve not only restored your ventilation system but also gained valuable insights into its overall health and performance, setting the stage for continued home maintenance and indoor air quality management.
Use this checklist table to quickly verify each major step in your vent inspection and cleaning process, ensuring a thorough and effective maintenance routine from start to finish.
| Step | Key Actions to Complete | Verification Criteria |
|---|---|---|
| Inspect vent locations & accessibility | Map vents, assess visibility & access | All vents identified & accessible |
| Remove vent covers | Turn off HVAC, safely store screws | Covers removed, interiors inspected |
| Check for blockages | Use flashlight & handheld mirror | Blockages documented & addressed |
| Clean vents and ducts | Vacuum, brush, wipe surfaces, use mask | Debris removed, problem areas noted |
| Reattach covers & final check | Securely reinstall, test airflow | Covers aligned, system operates well |
Ready for Cleaner, Healthier Air? Let Us Handle the Hard Parts for You
You just followed a detailed guide on how to inspect and clean your home’s vents, uncovering hidden dust, blockages, and potential signs of mold or poor airflow. While taking these steps on your own is empowering, the process can be time-consuming and some problems are hard to fix without professional tools. If you spotted mold, heavy debris, or uneven airflow, your comfort and air quality could still be at risk. Many Texas homeowners want peace of mind but worry about missing something important inside hard-to-reach ducts.
Let Green Home Duct Cleaning do the heavy lifting for you. Our expert team uses powerful, eco-friendly technology to deliver a deeper clean than DIY efforts and eliminate hidden health hazards. Do not let allergens or unseen blockages linger any longer. Schedule your next-level air duct service today with Green Home Duct Cleaning. Trust the professionals serving San Antonio and Austin for a safer, fresher home. Visit our website now and breathe easier starting today.
Frequently Asked Questions
What is the importance of checking my home’s vents?
Checking your home’s vents is crucial for maintaining optimal air quality, energy efficiency, and overall system performance. Regular inspections help identify blockages and potential issues before they become costly problems.
How often should I inspect and clean my vents?
It is recommended to inspect and clean your vents at least once a year. However, if you notice increased dust accumulation, strange odors, or changes in airflow, you should inspect them more frequently.
What tools do I need to check and clean my vent system?
You’ll need a screwdriver set, a vacuum with a hose attachment, soft-bristled brushes, a flashlight, and protective gear like gloves and a dust mask. Additional tools like a handheld mirror or flexible inspection camera can facilitate deeper inspections.
How can I identify blockages in my vents?
Perform a visual inspection of the vents using a flashlight to look for dust, debris, or any signs of blockage. Soft obstructions can be removed with a vacuum attachment, while more substantial blockages may require specialized tools or professional help.
Recommended
- Air Duct Inspection Guide 2025 for Texas Homeowners – Green Home Services
- Air Duct Inspection Checklist 2025 for Texas Homeowners – Green Home Services
- How to Clean Dryer Vents in Texas Homes: 2025 Guide – Green Home Services
- Dryer Vent Cleaning for Renters: Texas Homeowner Guide 2025 – Green Home Services