
Getting your home’s air ducts truly clean is about more than just dusting vents. Most people do not realize that a single cleaning session can improve your HVAC system’s efficiency by up to 20 percent according to the US Department of Energy. That means what seems like a simple cleaning project could actually help you save money every single month and make your air healthier at the same time.
Table of Contents
- Step 1: Gather Necessary Tools And Supplies
- Step 2: Prepare Your Home For Duct Cleaning
- Step 3: Inspect And Access Your Ducts
- Step 4: Clean Air Ducts Using Proper Techniques
- Step 5: Verify Cleaning Results And Seal Ducts
- Step 6: Schedule Regular Maintenance For Ducts
Quick Summary
| Key Point | Explanation |
|---|---|
| 1. Gather Proper Tools Before Cleaning | Assemble key supplies like HEPA vacuums, brushes, and protective gear to ensure an efficient duct cleaning process. |
| 2. Prepare Your Home for Cleaning | Clear areas around vents and protect furniture to facilitate easy access for technicians and maintain cleanliness. |
| 3. Conduct a Thorough Duct Inspection | Inspect ducts for dust, mold, or blockages to address specific issues effectively during the cleaning. |
| 4. Use Proper Cleaning Techniques | Employ HEPA vacuums and specialized brushes to thoroughly clean ducts while avoiding damage to the system. |
| 5. Schedule Regular Maintenance for Ducts | Establish a maintenance schedule that includes inspections and filter changes to maintain optimal air quality over time. |
Step 1: Gather Necessary Tools and Supplies
Preparing for a thorough duct cleaning requires strategic planning and the right equipment. Before you begin your homeowner duct cleaning checklist, assembling the appropriate tools will streamline the entire process and ensure comprehensive results. Gathering supplies isn’t just about having random cleaning materials but selecting precision instruments that will effectively remove dust, debris, and potential allergens from your home’s ventilation system.
Your primary toolkit should include several key items that enable a professional grade cleaning experience. Start with protective personal equipment including disposable gloves, safety glasses, and a high quality dust mask to prevent direct contact with airborne particles. A respirator mask rated for fine particulate matter provides additional respiratory protection during the cleaning process. Specialized cleaning tools are crucial for accessing and thoroughly cleaning different sections of your ductwork.
Learn more about our professional duct cleaning preparation guide to understand the nuanced equipment requirements. Essential tools include a powerful vacuum with HEPA filtration designed specifically for duct cleaning, extendable brush attachments, microfiber cleaning cloths, and compressed air canisters. Professional grade cleaning kits often include telescoping inspection cameras that allow you to visually assess the interior of your ductwork before and after cleaning.
For mechanical access, you will need screwdrivers to remove vent covers, a sturdy ladder to reach high vents, and flexible rod attachments that can navigate through complex ductwork configurations. A bright flashlight helps illuminate dark spaces and identify specific areas requiring intense cleaning. Cleaning solutions should be EPA approved, environmentally friendly, and specifically formulated for HVAC systems. Avoid harsh chemicals that might leave residual odors or potentially damage your ductwork’s interior surfaces.
Before beginning, create a systematic inventory of your gathered supplies. Verify each tool’s condition and functionality. Check that extension cords reach necessary areas, batteries are charged in portable equipment, and all protective gear fits properly. Organizing your tools in a portable container or workstation will minimize disruptions during the cleaning process and help you maintain an efficient workflow.
Below is a table summarizing the key tools and supplies needed for effective duct cleaning, along with their purposes and important notes for each item.
| Tool/Supply | Purpose | Notes |
|---|---|---|
| HEPA Vacuum | Remove dust and debris from ducts | Must have HEPA filtration for best results |
| Extendable Brush Attachments | Dislodge and clean duct interior surfaces | Choose soft bristles to prevent duct damage |
| Microfiber Cleaning Cloths | Wipe vent covers and exposed surfaces | Lint-free for minimal residue |
| Compressed Air Canisters | Blast debris from hard-to-reach areas | Use short bursts, follow safety instructions |
| Flashlight | Illuminate ducts for inspection and cleaning | High lumen preferred for dark spaces |
| Screwdrivers | Remove and replace vent covers | Choose appropriately sized heads for different screws |
| Protective Gear (gloves, mask, glasses) | Protect against dust, allergens, and debris | Use a respirator if fine particles expected |
| EPA Approved Cleaning Solution | Sanitize and eliminate odors/microbes | Avoid harsh chemicals or non-HVAC-safe cleaners |
| Ladder | Access high vents | Ensure stable placement |
| Inspection Camera | Visually assess inside ductwork | Telescopic or flexible for hard-to-reach sections |
The Centers for Disease Control and Prevention recommends using appropriate cleaning supplies that minimize potential health risks. Your meticulous preparation transforms a potentially complex task into a manageable home maintenance project.
Step 2: Prepare Your Home for Duct Cleaning
Transitioning from tool gathering to actual duct cleaning requires careful home preparation that minimizes disruption and maximizes cleaning effectiveness. Your goal in this step is to create an optimal environment that allows technicians unrestricted access while protecting your home’s interior and personal belongings. Think of this stage as setting the foundation for a successful and efficient duct cleaning process.
Comprehensive area preparation involves strategic room clearing and protecting your living spaces. Begin by removing fragile items from surfaces near air vents and registers. Artwork, decorative objects, and electronic devices should be carefully relocated to prevent potential accidental damage during the cleaning process. Moving furniture away from vents creates clear pathways for technicians and their equipment, allowing them to work efficiently without navigating around obstacles.
Explore our comprehensive guide for Texas homeowners on spring air duct maintenance to understand the nuanced preparation requirements. Cover furniture and floor areas near vent locations with drop cloths or plastic sheeting to protect against dust and potential cleaning solution splatter. Pay special attention to hardwood floors, carpets, and delicate surfaces that might be vulnerable to debris or accidental contact with cleaning equipment.
Ventilation system preparation requires systematic approach. Turn off your HVAC system completely before technicians arrive to prevent circulation of dust and debris during the cleaning process. Identify and clearly mark all vent and return air register locations to streamline the technician’s workflow. If you have pets or small children, consider arranging alternative accommodations or creating a designated safe zone away from the cleaning area to minimize disruptions and potential safety risks.
According to the U.S. Environmental Protection Agency, homeowners should communicate specific concerns or problem areas with technicians before cleaning begins. Conduct a preliminary walkthrough of your home, noting any visible dust accumulation, unusual odors, or areas where airflow seems restricted. This preparatory communication ensures a targeted and thorough cleaning approach.
Final verification involves confirming all preparation steps are complete. Ensure all vents are accessible, protective coverings are in place, and your HVAC system is switched off. Create a clear path for technicians to move equipment between rooms, and have your gathered cleaning tools nearby for immediate use if needed. Your meticulous preparation transforms a potentially complex home maintenance task into a smooth, efficient process.
The table below offers an overview of each main step in the duct cleaning process, including a brief description, estimated difficulty, and expected outcome.
| Step | Description | Difficulty | Key Outcome |
|---|---|---|---|
| Gather Tools and Supplies | Assemble all equipment and cleaning materials | Easy | Ready for efficient, thorough cleaning |
| Prepare Your Home | Clear, protect, and set up areas for cleaning | Easy | Home protected, easy access for cleaning |
| Inspect and Access Ducts | Examine ductwork, identify problem areas | Moderate | Issues identified before cleaning begins |
| Clean Air Ducts | Remove dust and debris using proper techniques | Moderate | Ducts free of dust, allergens, contaminants |
| Verify & Seal Ducts | Inspect results and seal leaks post-cleaning | Moderate | Improved air quality, energy efficiency |
| Schedule Regular Maintenance | Establish ongoing maintenance routines | Easy | Long-term duct cleanliness and system efficiency |
Step 3: Inspect and Access Your Ducts
Inspecting and accessing your home’s ductwork represents a critical phase in the comprehensive cleaning process. This step transforms your previous preparation into actionable investigation, allowing you to understand the specific condition and potential challenges within your ventilation system. Your goal is to thoroughly examine the ductwork’s interior, identifying areas of concern and determining the most effective cleaning approach.
Visual inspection requires methodical and careful examination of accessible duct sections. Begin by removing vent covers carefully, using your screwdriver to prevent damaging the surrounding surfaces. Utilize your powerful flashlight to illuminate the interior, looking for telltale signs of accumulated dust, potential mold growth, or evidence of pest infiltration. Specialized inspection techniques can reveal hidden issues that might compromise your home’s air quality. A telescoping inspection camera becomes invaluable during this process, allowing you to view areas typically hidden from direct view.
Explore our comprehensive air duct inspection guide for Texas homeowners to understand the nuanced aspects of thorough duct examination. Pay close attention to connections between duct segments, checking for any signs of air leakage, loose connections, or structural damage. Look for discoloration, unusual odors, or visible debris accumulation that might indicate deeper systemic issues within your ventilation system. Some homeowners might discover unexpected challenges like construction debris, pet hair, or mineral deposits that require specialized cleaning techniques.
Accessing different sections of your ductwork demands patience and strategic approach. If your home has multiple levels or complex HVAC configurations, you might need to create temporary access points. Use your extendable ladder cautiously, ensuring stable positioning before attempting to reach higher or more challenging duct locations. Some homeowners might discover that certain sections require professional intervention, particularly if the ducts run through tight crawl spaces or areas with limited accessibility.
According to the U.S. Environmental Protection Agency, homeowners should be vigilant about visible contamination signs. Document your findings through photographs or detailed notes, which can help you communicate specific concerns with professional cleaning technicians. This systematic documentation serves as a valuable reference point, helping track the effectiveness of your cleaning efforts and identifying potential recurring issues.
Final verification involves confirming you have thoroughly examined all accessible duct sections. Ensure all vent covers are temporarily removed, your inspection tools are ready, and you have a clear understanding of your ductwork’s current condition. Your meticulous inspection sets the stage for a targeted and effective cleaning process.
Step 4: Clean Air Ducts Using Proper Techniques
Cleaning air ducts represents the most critical phase of your home maintenance process, transforming accumulated dust and potential contaminants into a pristine ventilation system. Your previous inspection and preparation now converge into a systematic cleaning approach that requires precision, patience, and methodical execution. The goal is not just surface cleaning but comprehensive removal of dust, allergens, and potential microbial growth that can compromise your indoor air quality.
Mechanical cleaning techniques form the foundation of effective duct maintenance. Begin by connecting your HEPA filtered vacuum to the main supply duct, creating negative pressure that prevents dust from dispersing throughout your home. Use specialized brush attachments with soft bristles to gently dislodge accumulated debris, working systematically from the furthest points of your ductwork toward the primary collection point. Compressed air tools become invaluable during this process, allowing you to blast loose particles from hard to reach corners and seams, ensuring a thorough cleaning that goes beyond surface-level treatment.
Discover our comprehensive guide to best practices in Texas home duct cleaning to understand the nuanced techniques professionals employ. Pay meticulous attention to different duct materials. Flexible ducts require gentler approaches compared to rigid metal ductwork. Rotate your cleaning tools slowly, maintaining consistent pressure to prevent potential damage while effectively removing accumulated dust and potential microbial growth. Some homeowners might encounter more challenging scenarios like significant dust buildup or minor mold presence, which might necessitate specialized cleaning solutions or professional intervention.
Chemical treatment represents an optional but often recommended phase of duct cleaning. Use EPA approved, environmentally friendly antimicrobial solutions specifically designed for HVAC systems. Apply these solutions sparingly and according to manufacturer instructions, focusing on areas with visible contamination or persistent odor issues. Ensure proper ventilation during and after chemical treatment, allowing sufficient time for solutions to dry completely and prevent potential moisture related complications.
According to the U.S. Environmental Protection Agency, homeowners should be cautious about over-cleaning and potential system damage. Document your cleaning process, noting areas of significant debris accumulation and the techniques used to address them. This documentation serves as a valuable reference for future maintenance and helps track the overall health of your home’s ventilation system.
Final verification involves reassembling all vent covers, ensuring no tools or cleaning materials remain inside the ductwork. Conduct a visual inspection to confirm thorough cleaning, and prepare for the final step of system restoration and air quality assessment.
Step 5: Verify Cleaning Results and Seal Ducts
The final stage of your duct cleaning process involves comprehensive verification and protection of your newly cleaned ventilation system. This critical step transforms your meticulous cleaning efforts into long lasting air quality improvement, ensuring that your hard work translates into tangible benefits for your home’s environmental health. Your primary objectives are to confirm the effectiveness of the cleaning and create a robust seal that prevents future contamination.
Visual verification requires systematic and thorough examination of your ductwork. Utilize your inspection camera or powerful flashlight to review each section, comparing the current state with your initial pre-cleaning photographs. Look for complete removal of dust accumulation, absence of visible debris, and clean duct surfaces. Comprehensive assessment goes beyond visual inspection. Run your HVAC system for 15-20 minutes after cleaning, using your hand to feel airflow from different registers and noting any unusual odors or particulate release. Some homeowners might discover minor areas requiring additional attention, which can be addressed through targeted spot cleaning or professional follow-up.
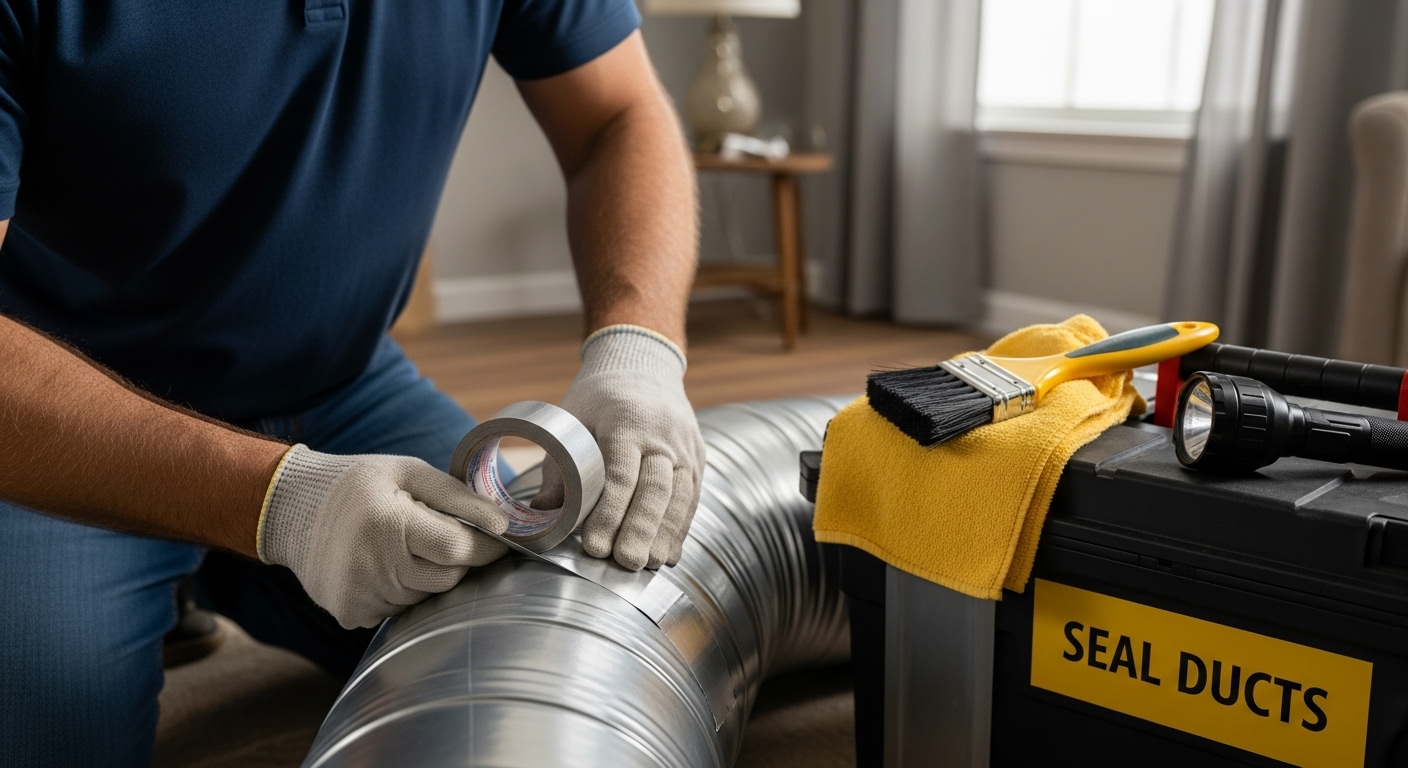
Check out our comprehensive air duct inspection checklist for Texas homeowners to understand advanced verification techniques. Sealing your ductwork becomes the next crucial phase. Use professional grade mastic sealant or aluminum tape specifically designed for HVAC systems to address any visible joints, connections, or potential air leakage points. Focus on areas where different duct sections connect, paying special attention to transitions between metal and flexible ductwork. Proper sealing prevents dust reintroduction and improves overall system efficiency.
Consider performing an air quality test to objectively measure the cleaning’s effectiveness. Portable indoor air quality monitors can provide immediate feedback on particulate matter, humidity levels, and potential contaminant presence. These devices offer scientific validation of your cleaning efforts, giving you concrete data about your home’s improved air environment. Some advanced monitors can even track improvements over time, helping you establish a baseline for future maintenance.
According to the U.S. Department of Energy, properly sealed and cleaned ductwork can improve HVAC system efficiency by up to 20%. Document your entire cleaning process, including before and after photographs, notes on techniques used, and any observations. This documentation serves as a valuable reference for future maintenance and can help track your home’s air quality progression.
Final verification involves reassembling all components, replacing vent covers, and conducting a final system test. Listen for any unusual sounds, check for consistent airflow, and observe your HVAC system’s performance. Your methodical approach has transformed your home’s ventilation system, promoting healthier indoor air and potentially improving overall energy efficiency.
Step 6: Schedule Regular Maintenance for Ducts
Establishing a consistent maintenance routine transforms your initial duct cleaning effort from a one-time task into a comprehensive home air quality strategy. Regular maintenance prevents the gradual reaccumulation of dust, allergens, and potential contaminants, ensuring your ventilation system remains clean and efficient. Think of this step as creating a proactive shield that protects your home’s indoor environment and maintains the investment you’ve already made in thorough duct cleaning.
Developing a maintenance schedule requires understanding your home’s unique environmental factors. Homes with pets, located in dusty regions, or experiencing frequent construction nearby might need more frequent inspections. Professional recommendations typically suggest comprehensive duct inspections every three to five years, with annual visual checks and filter replacements. Consider creating a dedicated home maintenance calendar that tracks your HVAC system’s performance, filter changes, and potential cleaning requirements. Some homeowners benefit from setting digital reminders or smartphone alerts to ensure consistent follow-through.
Explore our comprehensive guide to duct cleaning frequency in Texas to understand region-specific maintenance recommendations. Implement a multi-tiered maintenance approach that includes both self-performed and professional assessments. Quarterly visual inspections of visible vent areas, monthly air filter replacements, and annual professional HVAC system evaluations create a robust maintenance framework. Pay special attention to warning signs like reduced airflow, unusual odors, increased energy bills, or visible dust accumulation around vents, which might indicate necessary intermediate cleaning or system evaluation.
Technology can significantly enhance your maintenance tracking. Modern smart home systems and HVAC monitoring tools can provide real-time insights into your ventilation system’s performance. Some advanced systems offer air quality tracking, filter replacement notifications, and performance analytics. These technological solutions transform maintenance from a reactive to a predictive process, helping you address potential issues before they become significant problems.
According to the U.S. Environmental Protection Agency, regular system maintenance is crucial for maintaining optimal indoor air quality. Document each maintenance activity, including dates of inspections, filter changes, and any professional service visits. This documentation serves multiple purposes: tracking system health, identifying potential recurring issues, and providing valuable information for future HVAC professionals.
Final verification involves establishing a comprehensive maintenance log, setting up digital or physical reminders, and committing to a consistent review process. Your proactive approach ensures that the clean, efficient ductwork you’ve worked hard to achieve remains in top condition, protecting your home’s air quality and your family’s health.
Ready for Clean, Healthy Air in Your Home?
You have worked hard to follow every step in the “Homeowner Duct Cleaning Checklist for a Healthier Home.” But sometimes, even with the best preparation and effort, it is tough to achieve a truly deep clean or resolve airflow issues alone. Persistent dust, lingering odors, hidden debris, and the threat of unseen allergens can leave you wondering if your family is breathing the cleanest air possible. Do not let uncertainty affect your peace of mind or the comfort of your loved ones. For professional results and long-lasting protection, it helps to have a trusted team by your side.
Trust the experts at Green Home Duct Cleaning for fast, eco-friendly, and detailed duct cleaning that reaches the places DIY methods miss.
- Protect your indoor air by scheduling an in-home inspection with a certified professional
- Ensure every inch of your ductwork is inspected, cleaned, and sealed for better air quality
- Experience the benefits of a healthier, more comfortable home environment
Want the full scope of what professional cleaning can achieve? See more of our service expertise in the Uncategorized Archives – Green Home Services to explore related tips, stories, and resources. For immediate answers or to book your service now, visit Green Home Duct Cleaning today. Do not wait—give your family fresher, cleaner air starting now.
Frequently Asked Questions
What tools do I need for duct cleaning?
To effectively clean your air ducts, you’ll need tools including a HEPA filtered vacuum, extendable brush attachments, microfiber cleaning cloths, a flashlight, and protective gear like disposable gloves and a dust mask. Specialized cleaning kits may also include inspection cameras for thorough assessment.
How can I prepare my home before duct cleaning?
Before cleaning, clear fragile items from surfaces near vents, move furniture away from duct locations, and cover floors with drop cloths. Ensure that your HVAC system is turned off and create a clear path for technicians to work efficiently.
How do I inspect my ducts for cleanliness?
Inspect your ducts visually by removing vent covers and using a flashlight or inspection camera to check for dust, mold, or pest signs. Look for discoloration, unusual odors, and debris accumulation to determine areas needing attention.
What maintenance should I schedule after duct cleaning?
After duct cleaning, schedule regular maintenance every three to five years for comprehensive inspections. Perform monthly air filter replacements and quarterly visual inspections. Tracking these activities can help maintain your home’s air quality and optimize HVAC efficiency.